I will tell you, the road to getting these cupcakes to come out with the perfection that they did, was a very long one.
On my first try, the cupcakes came out with huge cracks in them, and fell (a lot) when taken out of the oven. I used lemon juice for flavor, and after tasting they really didn’t taste lemony at all, and the filling was very dry. I used a graham cracker crust, which was OK but nothing special.
Then I tried a different recipe using both regular and Mascarpone cheese, and decided to add lemon extract to the filling along with the lemon juice, and a gingersnap crust. Those also puffed way up in the oven and collapsed when taken out of the oven. Even after baking 30 minutes, they looked raw. I tasted them anyway, and the filling and crust tasted very good. They just looked horrible.
Now I was on a mission. Never one to quit anything, I was determined to get the perfect cheesecake cupcake. I remembered I had seen a recipe using a water bath, so I turned to my Cooks Illustrated cookbooks and looked up cheesecakes (I know I should have probably have done that in the first place). They have tested cheesecakes both ways (water bath and non-water bath). The results were that the water bath method is far superior. So, here I go again. I merged some of the ingredients I used in the previous testings, and used some from the Cooks Illustrated recipe (sour cream vs. heavy cream). Honestly, the whole thing is making me crazy, but I am determined to get this recipe right.
Well my hard work and persistence paid off. The cheesecake made in the water “far exceeded” the two recipes I made without. Especially as far as the rising up in the oven, and falling drastically when taken out of the oven, which almost mimicked a souffle. The water bath method kept the level of batter basically the same, they cooked perfectly, and didn’t even sink at all when cooled! I used silicone muffin cups that made the mini cheesecakes almost slide out of the liners. The lemon flavor was perfect.
The key to this recipe is baking in the water bath, testing for doneness with an instant read thermometer, and those silicone baking cups were well worth the money!
These cupcakes are cupcake size, and are great for bridal or baby showers, anniversary parties or any special occasion. If you love cheesecake, these are great because they are just a small portion. Creamy, lemony filling with a flavorful gingersnap crust. Try to eat one, but I doubt you can!
Mini Lemon Cheesecakes
Crust:
3/4 c. gingersnap cookies, crushed
3 Tbsp butter, melted
Filling:
12 oz. soft cream cheese
1/2 c. plus half of 1/4 c. sugar
2 large eggs
freshly grated rind of 1 large lemon
1 tsp lemon extract
Juice of 1 lemon
1/4 c. heavy whipping cream
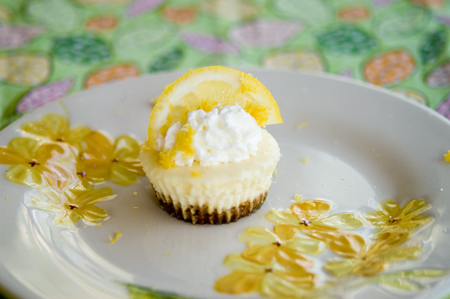
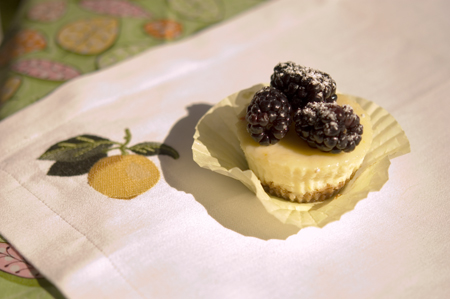
sliced lemons, lemon curd or blackberries (for decorating)
Preheat oven to 325° F. Line a muffin pan with 12 paper liners or butter 12 silicone muffin cups and place muffin pan or silicone cups on a jelly roll pan.
Melt butter in microwave or stove until melted. Add crushed gingersnap cookies to the melted butter. Mix well. Divide crust mixture between the cupcake liners (about a heaping tablespoon each). Press down firmly with the back of a teaspoon. Bake for 5 minutes. Remove from oven and cool.
In an electric mixer fitted with a paddle attachment, mix cream cheese slightly; about 5 seconds. Mix lemon rind with sugar in separate bowl. Add sugar to mixture and mix on medium speed until blended; about 3 minutes. Reduce to low, and add eggs, one at a time; beat until incorporated; about 30 seconds. Add lemon juice and lemon extract; and mix until incorporated approx. 5 seconds. Add heavy whipping cream and blend 5 seconds longer.
Spoon the batter into prepared paper liners or silicone liners (remember what you see is what you get after baking; they may rise very, very slightly).
Place jelly roll pan in the preheated oven and fill with water until half way up the cupcake pan or silicone liners. Bake approx 30 minutes, or until edges are set and middle feels set when pressed or instant thermometer reading in center reads 150° (try not to exceed 150° or filling will become very dry). Remove pan from oven, being very careful not to spill the boiling hot water*. Let the cupcakes cool in the water for about 10 minutes, then transfer to a wire rack to cool completely.
When cupcakes are cooled, chill in the refrigerator for at least 3 hours. Decorate each cupcake with a lemon slice, fresh blackberries dusted with a little confectioners sugar, or lemon curd.
*Use a turkey baster to remove some of the water from the pan so you can get the pan out of the oven without the danger of burning yourself with the boiling water.
For a graham cracker crust: substitute crushed graham crackers for the gingersnaps and add 1 Tbsp brown sugar.
Orange rind, juice and extract can be substituted for lemon rind, juice and extract if desired. Decorate with a twisted orange slice or berries.


4 Comments
Deepta
May 22, 2012 at 8:31 amThank you so much for doing all the spadework for me :)I guess I will have to try the water bath. I did keep a roasting pan filled with water on the rack below the cupcake tray though. No cracking but they did sink.
SJ
May 22, 2012 at 10:09 pmDeepta, I couldn’t believe the difference between using the bath, and not using it! I had no problems with cracking or sinking. Make sure to use your instant read thermometer and check the temp for doneness. Overcooking can cause problems also.
AB
May 28, 2013 at 4:22 pmHi. Thanks for the advice. My mini cheesecakes have been falling. I am considering buying the sillicone baking cups. What brand did you buy? Do you still put the sillicone in a muffin tin? Do I use liners in the sillicone? Thank you.
Sandie
June 10, 2013 at 8:43 amI bought mine at William Sonoma, but you can get anywhere. You don’t put them in a muffin pan, just put on a jelly roll pan. You can add water to the jelly roll pan for the water bath. Don’t use liners in the silicone. The cheesecakes come out of the silicone fairly easy. Thanks!